Upgrading from CabGrid Stripe Integration version 2?
Due to significant changes in the the checkout process offered by Stripe, the upgrade to version 3.0 of the CabGrid Stripe Integration plugin for WordPress is a manual process. Read on for more details...
CabGrid Stripe Integration Add-on plugin version 2+ users can begin the update from within the CabGrid Stripe tab in their WordPress Admin.
Version 1.x users will need to purchase a new license and install the new version manually.
Set Up
Below is a guide to setting up version 3 of the CabGrid Stripe Integration add-on plugin. However, we recommend you also look at our overview of using Stripe with CabGrid Pro. Configuration instructions for version 2 are also available.
Assuming it has been installed, the CabGrid Stripe Add-on WordPress admin interface provides the following options. These are accessible by choosing the STRIPE tab on the main CabGrid Pro Admin page, or choosing the Stripe item in the CabGrid Pro sub-menu in the WordPress Admin.
Note: The options available in the CabGrid Pro Stripe Add-on admin tab will vary depending on payment type selected.


Stripe Account
A free Stripe account is required to use this add-on.
Payment Type Accepted
After a booking request is submitting, the CabGrid Stripe Add-on will offer customers the payment methods selected here. Money will be received by your Stripe account ready to pay out to your bank account.
Stripe offers many payment options in addition to basic credit card processing. These include iDEAL (Netherlands), GiroPay (Germany) and SoFort (Austria, Belgium, Germany, Italy, Netherlands, Spain).
Stripe Checkout
Stripe Checkout directs customers to a checkout page hosted by Stripe and accepts payment via a credit or debit card. Other methods are also supported (e.g. Apple Pay and Google Pay) and can be configured via your Stripe account. It is also possible to customise the look and feel of Checkout via the Stripe Dashboard. For more info, see Stripe Docs.
When Stripe Checkout is selected, no other on-site payment methods are available, though the PayPal option can still be enabled as this, too, takes users off-site to make payment.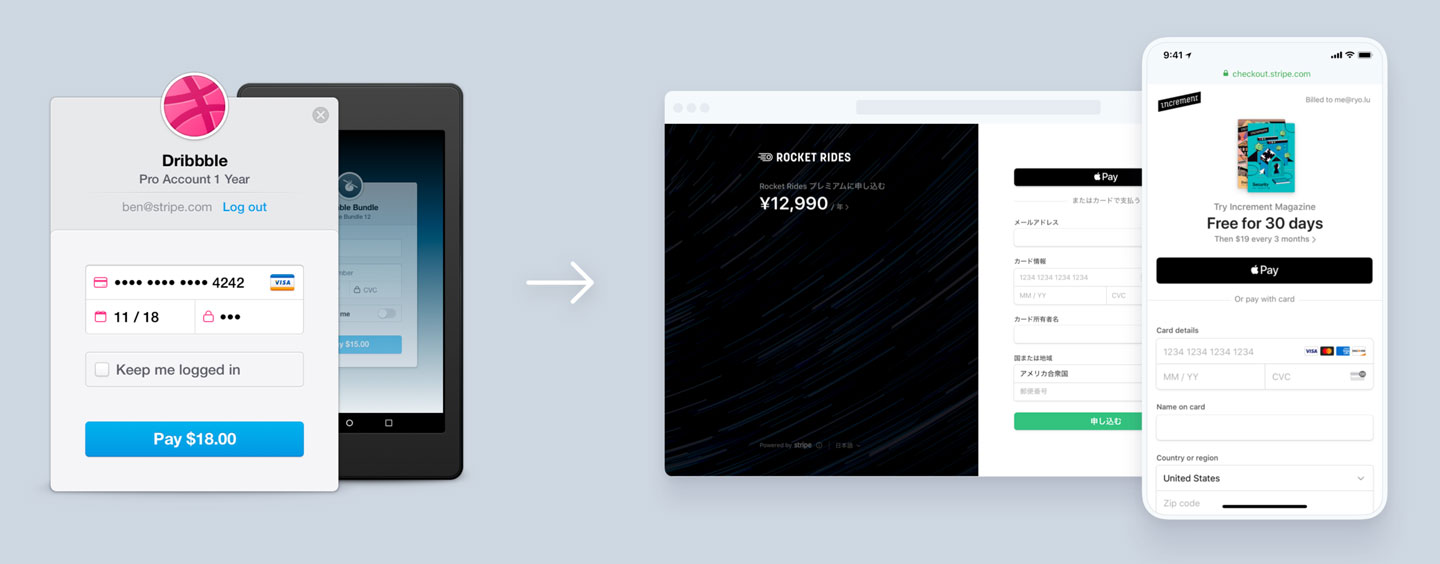
Other Payment Methods
Currently, the following payment methods are available. Customers are guided through the checkout process depending on a choice based on the payment methods selected.
Update (May 2024): Whilst the payment methods below are still supported by CabGrid, it is recommended to use the Stripe Checkout option if specialist payment options are required (other than regular credit cards or debit cards).
- Credit/Debit Cards
The required input fields (card number, expiry, CVC, etc) are presented within the CabGrid interface.
If required, the customer will be prompted to complete Strong Customer Authentication checks (e.g. 3D-Secure 2).
Your website should be served over a secure https connection.
If the transaction is successful, the 'Success Message' is presented to the customer within the same CabGrid booking interface. - iDEAL
The customer will be guided through the process of making an iDEAL payment.
When complete, the customer is sent to the 'Redirect URL' page as specified. - SoFort
For SoFort payments, the customer must select the country where their bank account is held.
Customers are guided through the process of making a payment via SoFort.
When complete, the customer is sent to the 'Redirect URL' page as specified. - GiroPay
The customer will be guided through the process of making a GiroPay payment.
When complete, the customer is sent to the 'Redirect URL' page as specified. - PayPal
The customer is directed to PayPal.com where they can make a payment using a credit card, debit card, or funds in their PayPal account. A PayPal account is not required. When complete, the customer is sent to the 'Redirect URL' page as specified.
Notes:
- Additional payment methods (iDeal, SoFort, GiroPay) must also be activated in your Stripe Account Dashboard.
- Available settings will vary depending on the payment types accepted.
- Beyond standard card processing, most require a secure connection (HTTPS).
- iDEAL, GiroPay & SoFort only process payments in EURO. Currency will be automatically set.
- The Webhook URL must be added to the Stripe account. This enables futher processing on your site either to show appropriate notifications to the customer after payment succeeds or fails, or to update the Booking Management Add-on (if installed). See below and our GiroPay, iDEAL, SoFort article.
Currency
Choose the currency for Stripe transactions by selecting from the drop-down. This lists all currencies supported by Stripe.
- This is independent of the currency symbol, which is set in the main CabGrid Pro OPTIONS tab.
- Some payment types only accept certain currencies, so currency may be automatically changed.
Surcharge/Deposit (charge amount variation)
Use a formula to adjust the price to apply a surcharge or deposit discount. Enter a formula in this box and it will be applied to the calculated price.
It is advisable to describe any price modifications in the 'Booking Sent Message' field under the OPTIONS tab on the CabGrid Pro admin page in WordPress.
Surcharge
If an additional fee should be charged for online Stripe transactions, this can be entered here.
Example 1: To add a fixed amount of $3.50, enter +3.5
Example 2: To add a 3 percent surcharge, enter *1.03
Deposit
If a deposit (or part) payment is preferred instead of full payment, a formula can be defined to calculate the fee paid.
Example 1: To take a 15% deposit, enter *0.15
Example 2: To insure the deposit is not too low add a fixed amount enter *0.15+3 to charge 15% of full price and add $3.00.
Example 3: To charge a flat rate deposit enter *0+5 (to charge $5 for all bookings regardless of amount).
Mode
Stripe can operate in either LIVE or TEST mode.
Test Mode
In TEST mode, only test card numbers are valid (e.g. 4242 4242 4242 4242). Any expiry date and CVC number (3 digits) can be used. Test mode simulates the functions of a real transaction without actually processing it.
For other payment types (GiroPay, SoFort & iDEAL), Stripe will simulate the payment process for testing.
Note: In test mode, the Stripe payment interface is only visible for logged in WordPress administrators. For all other visitors, Stripe is not available while in test mode.
Live Mode
In LIVE mode, only real valid card numbers and payments (bank transactions) are accepted and processed.
Stripe API Keys
Stripe provides API keys for both LIVE and TEST modes. They are separate and distinct. Depending on what mode you have set, the CabGrid Stripe admin interface will present fields for the appropriate API keys.
Publishable Key (LIVE/TEST)
 The publishable key is required for Stripe to function. Stripe requires API keys for both LIVE and TEST modes. These are a separate and distinct strings of characters.
Publishable API keys usually begin pk_test_ or pk_live_ and can be obtained from the Stripe dashboard after logging in.
To obtain either LIVE & TEST API keys you must click the switch labelled, "View Test Data" under the API menu on the left side of your Stripe Dashboard
Secret Key (LIVE/TEST)
The secret key is also required for Stripe to function properly on your site. Stripe requires API keys for both LIVE and TEST modes. These are separate and a distinct strings of characters.
Publishable API keys usually begin sk_test_ or sk_live_ and can be obtained from the Stripe dashboard after logging in.
To obtain either LIVE & TEST API keys you must click the switch labelled, "View Test Data" under the API menu on the left side of your Stripe Dashboard. See illustration above.
Loading
Stripe advise loading their components on every page to improve fraud prevention. However, the CabGrid Stripe Integration Add-on can be set to defer loading Stripe until it is required (after the customer submits a booking request and is ready to checkout).
This may offer some [perception of] loading time (speed) improvements, but may not be as reliable.
This setting is labelled, "Load Stripe" under the STRIPE tab in Cab Grid Pro. It has the following options:
- with page load - default setting, loads Stripe with every page so it is ready to use at any time.
- after booking request submitted - dynamically loads Stripe components when the customer submits a booking request.
(Note: this feature also requires CabGrid Pro v5.2.2 or higher.)
Icon/Checkout Image
 (Icon applies when 'Stripe Checkout' is the only payment method selected.)
This is an image that is displayed at the top of the Stripe checkout interface. However, if there is a vehicle image associated with the journey, this is used instead.
In the Stripe CabGrid admin tab, clicking the text box opens the media browser where you can either upload or select an image to be used.
Checkout Title
(Title applies when 'Stripe Checkout' is the only payment method selected.)
This is text that is shown at the top of the Stripe checkout box. It would usually be your company name.
Label
This is the text shown on the checkout buttons. There are two instances: Firstly, if only Stripe checkout payment type is selected, the button that opens the checkout box and, secondly, the button that submits the payment details. The same text (as entered here) is used to label both buttons.
Success Message
This message is shown to visitors if their Stripe transaction is successfully processed. It would potentially provide information or instructions concerning the booking.
For inline card payments, this message is displayed within the CabGrid booking interface. For payments where the customer is directed off-site (e.g. iDeal, Paypal, Stripe Checkout), this message can be shown on the Redirect URL page by adding a shortcode:
Payment Status: TIMED OUT, CANCELLED OR FAILED
Refresh this page to check payment status. It is likely your payment has failed or been cancelled. Your booking request has been sent, but your payment has not been verified. To make a payment or for more information please contact us quoting your booking reference number:
The success message box accepts text substitutions allow data from the booking to be inserted in to the message.
Redirect URL
Redirect URL applies when Stripe Checkout or additional payment mechanisms are selected. e.g. GiroPay, iDEAL and/or SoFort.
This is the web address of the page customers see when the transaction is completed. It will usually be a dedicated WordPress page which needs to be created independently. It would normally provide details of the next steps in the process (booking confirmation etc.).
This page is shown regardless of the outcome of the transaction (if it either fails or succeeds), and therefore should contain generic information. For example, show a message such as this:
Thank you. Your booking is PENDING. You will receive an email (or text message) once confirmed.
More significant and detailed messages are sent by the webhook functionality - especially if the Booking Management Add-on is installed.
From CabGrid Stripe Integration version 3.3 the payment status and success message can be added to this page via a shortcode: Refresh this page to check payment status. It is likely your payment has failed or been cancelled. Your booking request has been sent, but your payment has not been verified. To make a payment or for more information please contact us quoting your booking reference number: Payment Status: TIMED OUT, CANCELLED OR FAILED
This shortcode will attempt to display the status of the payment (provided the webhook URL has been added to your Stripe account). Possible status types include:
- SUCCEEDED/SUCCESS/PAID
- FAILED
- ABORTED/CANCELLED
- TIMEOUT
- PENDING
Only when a SUCCESSFUL payment is detected will the Success Message be displayed. If another status is detected, the page will refresh until it a successful response is achieved (or a timeout expires - about 30 minutes). This is because, in some cases, Stripe reaches out in the background to update the payment status. This does not always happen instantly.
Webhook URL
(Webhook URL is displayed when Stripe Checkout or additional payment options are selected. e.g. GiroPay, iDEAL and/or SoFort.)
This is a READ-ONLY field. It cannot be edited. It provides the web address (URL) of the page that processes payments in the background. For example, if the CabGrid Booking Management Add-on is installed, it will set the booking to paid.
The URL provided here should be entered in the Stripe admin panel (when logged in). Detailed instructions can be found here.
Invoicing
If the Booking Management Add-on is installed, an email message can be sent directly to the customer automatically when a payment is successfully completed. This can be formatted like an invoice or receipt. It is configured in the PAID message field under the SETTINGS tab.
Stripe is also capable of generating and sending invoices directly to customers. See https://stripe.com/docs/billing/invoices#invoices for more info on how to send an invoice through Stripe.

If some one wishes to be updated with most recent technologies therefore he must be pay a quick visit
this website and be up to date all the time.
Here is my web blog :: jasa desain company profile, Ben,