Jump to: Intro | Set Up | Customer Experience | Configuration | Troubleshooting
Process card payments online with Stripe...
Cab Grid Pro has credit card payment processing built in via Paypal. However, there are some limitations to Paypal - such as currency and the countries where it is supported.
Stripe is an alternative card processing provider. Stripe offers a more integrated checkout experience. It is easy to sign up for and supports more currencies.
What's more, we've done the integration work to provide a Stripe add-in plugin for Cab Grid Pro. This makes it super-easy to take card payments for journeys calculated through Cab Grid Pro.
Steps for setting up Stripe with Cab Grid Pro...
- Insure you have the latest version of Cab Grid Pro installed on your website (v4.3+ required)
- Sign up for a Stripe account
- Purchase and download the Stripe Add-on
- Install the Stripe Add-on on your website:
- Admin > Plugins > Add New > Upload Plugin
- Activate: Admin > Plugins > Installed Plugins > Cab Grid Stripe Integration > Activate
- Collect your API keys from Stripe (copy both TEST and LIVE publishable and secret API keys)
- Enter (paste) your API keys in the Cab Grid Stripe Integration settings page:
- Admin > Cab Grid Pro > Stripe
- Click 'Save Changes' button
- You may wish to configure other settings, such as the icon shown in the checkout window and the label on the checkout/pay button
The customer experience with Stripe enabled...

Cab Grid Pro Workflow (PDF)
When the Cab Grid Pro Stripe Integration add-on plugin is installed and activated, customers will automatically be offered a payment button once their booking info has been submitted. This means the booking request will always be sent regardless of whether the payment is completed.
The 'Booking Sent Message:' under Cab Grid Pro > OPTIONS can be used to advise customers to complete their payment online. For example, you might enter a message like, "Please make a payment to guarantee this reservation..."
When a payment is successfully completed Stripe will email details. This should include the system reference number so you can marry the booking request email to the payment.
After the customer completes a Stripe payment they are shown the 'Success Message' configured under the Cab Grid Pro Stripe Integration settings page.
Maintain the Paypal Option...
Paypal can still be offered along-side Stripe. If you enter your Paypal email address under Cab Grid Pro > OPTIONS > Paypal ID & Currency, the Paypal button will also be shown. If you remove your Paypal ID, then the Paypal button will not show.


Configuring Cab Grid Pro Stripe Integration Options
The WordPress admin interface provides the following options. This is accessible by choosing the STRIPE tab on the main Cab Grid Pro admin page, or choosing the Stripe item in the Cab Grid Pro sub-menu in the WordPress Admin.
Currency
Choose the currency for Stripe transactions by selecting from the drop-down. This lists all currencies supported by Stripe.
This is independent of the currency symbol, which is set in the main Cab Grid Pro OPTIONS tab.
Surcharge/Deposit (charge amount variation)
Use a formula to adjust the price to apply a surcharge or deposit discount. Enter a formula in this box and it will be applied to the calculated price.
It is advisable to describe any price modifications in the 'Booking Sent Message' field under the OPTIONS tab on the Cab Grid Pro admin page in WordPress.
Surcharge
If an additional fee should be charged for online Stripe transactions, this can be entered here.
Example 1: To add a fixed amount of $3.50, enter +3.5
Example 2: To add a 3 percent surcharge, enter *1.03
Deposit
If a deposit (or part) payment is preferred instead of full payment, a formula can be defined to calculate the fee paid.
Example 1: To take a 15% deposit, enter *0.15
Example 2: To insure the deposit is not too low add a fixed amount enter *0.15+3 to charge 15% of full price and add $3.00.
Mode
Stripe can operate in either LIVE or TEST mode.
In TEST mode, only the test card number is valid (4242 4242 4242 4242). Any expiry date and CVC number (3 digits) can be used. Test mode simulates the functions of a real transaction without actually processing one.
In LIVE mode, only real valid card numbers are accepted and processed.
Stripe provides API keys for both LIVE and TEST modes. They are separate and distinct. Depending on what mode you have set, the interface will present fields for the appropriate API keys.
Publishable Key (LIVE/TEST)

The publishable key is required for Stripe to function. Stripe requires API keys for both LIVE and TEST modes. These are separate and distinct strings of characters.
Publishable API keys usually begin pk_test_ or pk_live_ and can be obtained from the Stripe dashboard after logging in.
To obtain either LIVE & TEST API keys you must click the switch labelled, "View Test Data" under the API menu on the left side of your Stripe Dashboard
Secret Key (LIVE/TEST)
The secret key is also required for Stripe to function properly on your site. Stripe requires API keys for both LIVE and TEST modes. These are separate and distinct strings of characters.
Publishable API keys usually begin sk_test_ or sk_live_ and can be obtained from the Stripe dashboard after logging in.
To obtain either LIVE & TEST API keys you must click the switch labelled, "View Test Data" under the API menu on the left side of your Stripe Dashboard. See illustration above.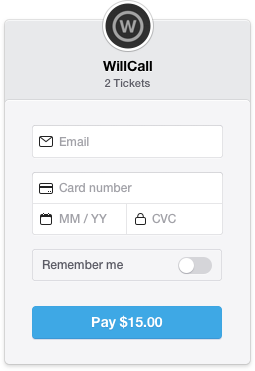
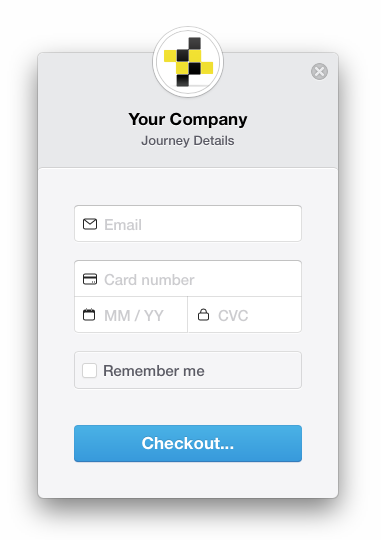
Icon
This is an image that is displayed at the top of the Stripe checkout box (as illustrated here with the Cab Grid icon).
Clicking the text box opens the media browser where you can either upload or select an image to be used.
Title
This is text that is shown at the top of the Stripe checkout box. It would usually be your company name.
Label
This is the text shown on the checkout buttons. There are two instances: Firstly, the button that opens the checkout box and, secondly, the button that submits the card details. The same text (as entered here) is used to label both buttons.
Success Message
This is the message shown to visitors if the Stripe card transaction is successfully processed. It would potentially provide information or instructions concerning the booking.
Invoicing
Stripe is capable or generating and sending invoices directly to customers. See https://stripe.com/docs/billing/invoices#invoices for more info on how to send an invoice through Stripe.
Troubleshooting Problems with the Stripe Add-on for Cab Grid Pro
Conflict with additional Stripe integrations.
An error message may appear like this:Cannot declare class Stripe\Stripe, because the name is already in use
In this case, another plugin or theme that invokes Stripe can cause a fatal PHP error. From version 1.4.2 of the Stripe Add-on we attempt to mitigate this issue, but if the other plugin/theme does not account for this, the error will persist.
The only way to rectify this is to ask the other plugin or theme developer to update their code (or update it yourself).
TLS1.2 Error Message
An error message may appear like this:TLS 1.2 is not supported. You will need to upgrade your server/hosting environment.
This could be a genuine error, but changes at Stripe mean earlier versions of the Stripe Add-on are displaying this message even if TLS 1.2 is supported.
To resolve this update to the latest version of the Stripe payment processing add-on. This can be done from either the plugins page or the updates page in the WordPress admin.
At the time of writing, versions 1.5.2 (or later) and 2.1 (or later) have accounted for this problem.
Hi there,
I like to idea of using Stripe as payment gateway.
However, what if for some reason:
The customer booking enquiry> then gets a Pay Now option > enters valid cc details and completes transaction > for whatever reason the booking cannot be accepted….
In this example the customer has paid and the job cannot be completed – doesn’t this present a problem of organising a refund, customer dissatisfaction etc.
Is there any way to hold off on the offer of a Pay Now option until:
… The customer only receives a Pay Now option AFTER the driver has accepted the job? Possibly via a link in an email?
Payment buttons (Paypal & Stripe) are presented at the end of the booking process if enabled. It is true that a customer could make a payment for a journey that could not subsequently be fulfilled. In this case you would have to refund the payment. This isn’t particularly difficult to do via either the Paypal or Stripe admin websites. However, I appreciate it may not represent the best customer experience. Though, having the customer wait for the booking to be accepted before paying may also lead to their booking elsewhere too.
That said, if you want to work it that way, you could implement a work-around via the Booking Management Add-on. What you would need to do is hide the payment buttons presented at the end of the booking form using CSS. You could add the following code to the ‘Styling CSS’ box under the OPTIONS tab on the Cab Grid Pro admin page in WordPress:
.cabGridPro:not(#cgb-buttons) .cabGridProPayButton {display: none !important;}
When you process the booking via the Booking Management Add-on you would tick the box to include a payment link in the acceptance message. The customer would click this link to be directed to a separate page on your site to make a payment via your chosen payment methods. This page is generated automatically by Cab Grid.
Please respond to mail asap regarding the stripe addon
Please remember, when in TEST mode, the Stripe checkout button is hidden and only visible if logged in to WordPress.