WordPress will usually attempt to send email messages (taxi booking notifications, booking confirmations, payment notifications, contact form submissions, etc) using a web server’s built-in mail functionality. Most of the time this is adequate but sometimes there can be problems with mail deliverability from WordPress direct. (see Email deliverability – How to insure booking notifications get through )
Employing a 3rd-party service to insure email deliverability is often a reliable and cost-effective solution. In this article we discuss setting up SendGrid to send CabGrid email messages. SendGrid offers a free tier of service, so it’s ideal to get started with.
![]()
Requirements
- A free SendGrid account.
- A free SMTP plugin such as WP Mail SMTP by WPForms, or POST SMTP Mailer by Post SMTP.
 How to set up SendGrid with CabGrid
- Install the WP Mail SMTP plugin:
- From the WordPress Admin Panel, go to PLUGINS > ADD NEW.
- In the SEARCH box on the right, enter “WP Mail SMTP by WPForms”
- Look for the WP Mail SMTP plugin details box. Click the INSTALL NOW button.

- Click the ACTIVATE button
- Collect Send Grid API key
- Register for a free Send Grid Account
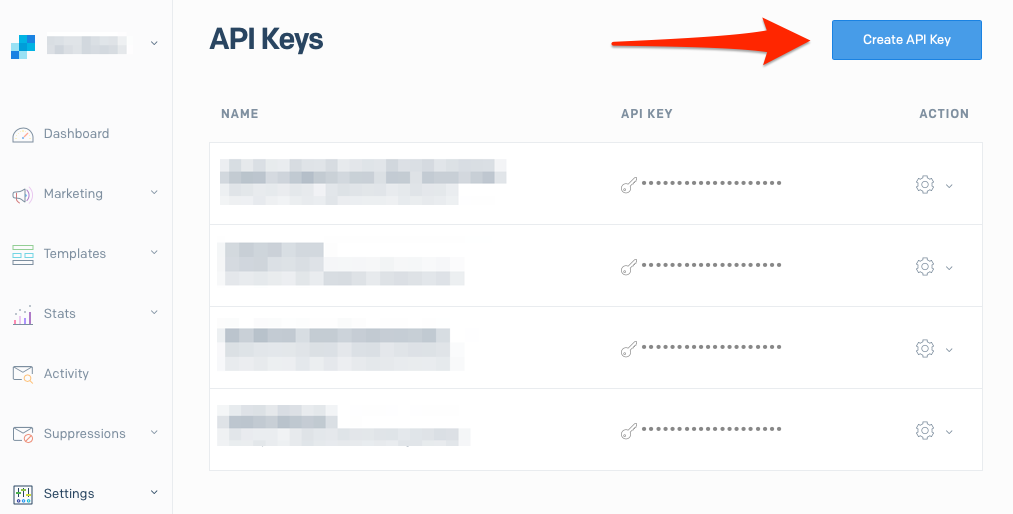
- With the Send Grid, visit the API Keys page and click the blue CREATE API KEY button.

- Complete the ‘Create API form’

- Enter a NAME for this key (this can be anything, but probably your-website-name will suffice)
- You can simply choose FULL ACCESS, but only MAIL SEND is required, so click RESTRICTED ACCESS
- Click MAIL SEND
- Click the slider on the right side to assign FULL ACCESS for the Mail Send item
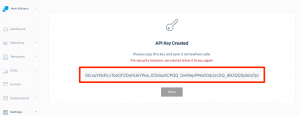
- Click the blue CREATE & VIEW button at the bottom
- Copy the API key (select, then crtl/cmd-c). The API key is only displayed once!
- Configure the WP Mail SMTP plugin:

To begin with, switch back to your site’s WordPress Admin panel- In the admin menu on the left, click SETTINGS
- Under SETTINGS, click the WP Mail SMTP item.
- Enter your sending mail email address (e.g. [email protected]) next to ‘FROM EMAIL’
- Enter your name or company name next to ‘FROM NAME’
- Under the MAILER section, click the radio button next to the SEND GRID item.
- Next to API KEY, paste (crtl/cmd-c) the Send Grid API key copied in step 2.4 above.
- Click SAVE SETTINGS


Now, all email sent from the website, including CabGrid taxi booking notifications, booking confirmations (if Booking Management installed), payment notifications, and other messages will be sent via Send Grid, and the Send Grid dashboard provides useful stats on message deliverability.

